Saturday, April 27, 2013

Mini Tulips: Second Post - Complete

Well I succeeded in finishing my sister's birthday present, yay!

I was a little worried last night.  When I got home I didn't know where I'd put the basket.  After a short panic I found it.  This morning I filled it with some floral foam and covered it with mossy... stuff.

After that I added two leaves to each flower, the leaves I had left over I combined into groups of two, all the stems were then wrapped in green floral tape.

Then I arranged them into the basket.
I decided to separate the different colored tulips, putting the white ones in the middle, surrounding them with the light blue, then putting the dark blue around the edge.

However, it didn't look full enough, so I made 10 more sets of leaves and added those in:

So I promised a picture to show size and it took me a while to figure out what to use, I was going to use my iPhone until I realized I needed it to take the picture.  Then I realized this is a blog, most people should have an idea of how large a standard size mouse is.  So below is that photo and two other angles.

Project Stats:
Pattern: Mini Tulips
Flower Design: Dalene Kelly
Arrangement Design: Me
Started: April 24, 2013
Finished: April 26, 2013
Beads: 11/0 Czech Seed Beads
Wire: 26 ga. floral wire and Artistic Wire

Friday, April 26, 2013

Mini Roses: First Post

While I was working on my sister's tulips I found I had quite a bit of the white beads already strung on wire.  And I didn't have a gift yet for Mother's Day.  My sister's birthday, my dad's birthday and mother's day are celebrated within two weeks of each other.  I usually forget at least one while I'm buying or making presents.  So when I realized I still didn't have a gift for my mother I decided to make some mini roses since I thought they looked pretty nice in the book.

Like the tulips, the roses are two parts that need to be combined (not including the leaves).

The small, three leaf clusters on the left will be attached to the flower stems.
Then I had some fun.  I wanted more greenery to go in the arrangement, so I just started making bunches of leaves.  I looked at my mother's real mini rose outside to get an idea of what they should look like.
What I found odd was the largest leaves were on the ends of the stems and the smaller ones were toward the base.  Lesson of the day: Nature is weird.

The picture above are the two parts of the six flowers together.  Below is a close-up.

I have a fun little project to attempt for the vase for these guys.  That'll probably be sometime next week.

Project Stats:
Pattern: Mini Roses
Flower Design: Dalene Kelly
Arrangement Design: Me
Started: April 24, 2013
Beads: 11/0 Czech Seed Beads
Wire: 26 ga. floral wire and Artistic Wire

Thursday, April 25, 2013

Mini Tulips: First Post

I was helping my sister was clean out her garage the other day and she found a cute little basket that she was going to throw away.  I have two problems, one, I can think of ways to use just about anything someone tosses away, and two, I'm a pack rat.  So of course I knew how to use the basket and I took it off of her hands.  However, I'm going to give it right back to her... with a few improvements.

I've only posted two pictures of French Beaded Flowers, and those were finished.  Now you'll get to see one from start to finish.

First off, my materials:
This is pretty much everything I need to make beaded flowers.  Upper left corner is a tape measure for when I need a certain wire length or length of beads.  Upper right is a simple pair of wire cutters.  Lower left is a hank of beads, this is how I get most of my seed beads.  They are pre-threaded on string in about 18" long strands, obviously I use more than one color for each project.  I transfer the beads from the thread onto wire, the next two items going right.  The white circle is a spool of blue Artistic Wire, the next is a paddle of green floral wire.  Finally, a pair of hemostats.  I usually like to have at least two, but currently I only have one set on me.  The only "major" material I'm missing in the picture is the floral tape.

Now, let's get started.  I usually make all the parts first then assemble.
I don't really remember how big the little basket is, so I just made 5 of each color tulip.  These are made by twisting the wire into "continuous loops".  For more information go here.

Of course the tulips need their stamens, that's above.

The pattern I was using said to have two leaves per flower.  I just decided to make 40 leaves... they were easy to make...  I think I might have made too much.  They're in piles of 5 to help me keep count.

Here I added the stamens to the tulips, above, with a close-up of the three different colors, below.

Just to give you an idea of the size of these, I cannot fit my pinky into the cup of the tulips.  I'll try to make sure I have something in the final picture to give you a sense of size when it's done.  I'm making this for my sister's birthday this Sunday, so I should be finishing this up Friday.  I'm going to be with her all day tomorrow, so I won't have a chance to work on it, instead I'm going to work on some mini roses for Mother's day.  Actually it's almost 1am, I guess it is "tomorrow".

Project Stats:
Pattern: Mini Tulips
Flower Design: Dalene Kelly
Arrangement Design: Me
Started: April 24, 2013
Beads: 11/0 Czech Seed Beads
Wire: 26 ga. floral wire and Artistic Wire

Tuesday, April 23, 2013

Colombina: Fifth Post - Framed

And now for Colombina:


It's harder to see on this mat, but it's the same as Anthera's, just silver.  These swirls are actually easier to see in real life than Anthera's.  It's odd how the pictures display the opposite of real life.  This one was my favorite of the two from the beginning. And I think I like the framing job better as well.  I really wish I could have used a matching black frame on Anthera, but it just didn't exist.

As I mentioned before these were Christmas/Birthday gifts for my mother to put in her "mask" bathroom.  However she decided she didn't want them in that room.  She decided she wanted to put them in her "gray" bathroom downstairs.  In a way this is nice, more people will be able to see them in this bathroom since it's downstairs.

Well, this is it for me today.  I'm hanging out at my parents' house and since I finished Lambent I have nothing to work on.  I'll find something to occupy my time.

Anthera: Fourth Post - Framed

Here's the last two posts for the first five projects I framed recently.


I rarely single mat anything anymore.  I just think they usually look better with at least two mats.  However, on these two pieces, there just wasn't another mat that looked good with the pieces.  You can see on the upper right hand corner the mat has glossy black swirls on it to kind of match the swirliness of the piece.  According to Google, swirliness isn't a word... I'm using it anyway.

Colombina will be posted in a few moments.

Monday, April 22, 2013

Light and Shadow - Lambent: First Post - Complete

I wasn't going to work on these for a while, but I had already purchased the thread I wanted to use on Lambent, and I had some extra fabric from You're Never Too Old that I thought would work great for Lambent.  Only after I decided what fabric I was going to use did I realize that it was the same fabric used on the sample.

Apparently Lambent was the first of these small dragons that Eva Horne created.  I find it very interesting that it was also the first one I stitched.

Each dragon has a name associated with Light or Dark, which is where the name of the set comes from, Light and Shadow.  Lambent means: Glowing, gleaming, or flickering with a soft radiance.  The sample had it with a light yellow that got a little bit darker.  The thread I chose, Golden Star by Crescent Colors, is a bright yellow that goes orange.

Time for the pictures.

Here's just the first few stitches:
120 Stitches
 Next, I finished up his wing:
563 Stitches
 He has a tail now:
791 Stitches
 Now for his body, legs and feet:
999 Stitches
 And I seem to be doing their heads last, I guess that's just the way it works out.
1,187 Stitches - Complete
Project Stats:
Pattern: Light and Shadow - Lambent
Pattern by: Fire Wing Designs
Started Stitching: April 21, 2013
Finished Stitching: April 22, 2013
Fabric: 28ct. Dusk Cashel Linen
Floss: Crescent Colors Golden Star 2 over 2
Percentage: 100% complete
Stitches: 1,187 out of 1,187 complete

I knew this wouldn't take long, and he took less than two days.  I do like the color I picked for him, I think it looks better than the sample, but I'm biased.

Out of the remaining three I think I might be doing Stygian next, the upper left piece.  I think I have a piece of fabric that will look good with him.  But Nocturne will definitely be the next signet I work on.  I just have to wait for it to arrive.

Sunday, April 21, 2013

Samurai: First Post - Complete


I finally started working on Samurai!  And as you can probably tell by the post title I finished it too.  I was going to break this up into two posts, but I wasn't near my computer for the past week, so you're getting it all in one post!

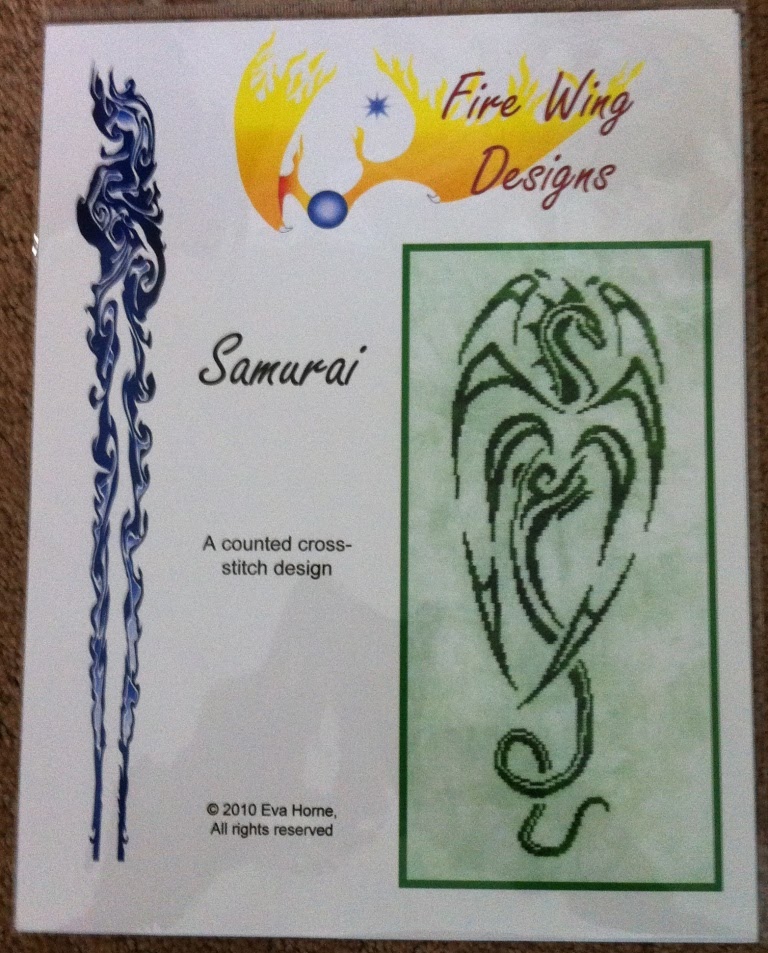
When I first saw the picture of this one on Fire Wing Designs' website I just fell in love with it.  I loved the dragon, I loved the colors.  Most of the other Signets I'm probably going to change the fabric or the thread, or both, but not this one.  I love how he looks in the picture so that's what I'm going to use.

I started this last week, after I did a bit the fabric looked a little small, sure enough it was, I'd cut it too small.  I was so mad at myself.  I had the rest of the Valor cloth, and it was big enough.  So I started again.

As of April 14, 2013, 431 stitches

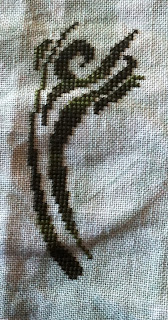
As of April 18, 2013, 1239 stitches
After getting this far I showed it to my mother and sister, both said it looked like a heart, what can I say... I agreed.  However, my nephew took a look at it and said, "Fish."  I don't see it, but I think everything looks like fish to him.

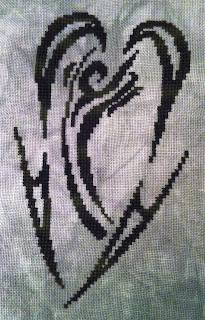
As of April 19, 2013, 1676 stitches
After finishing the tail I showed it to my sister again, now it doesn't look like a heart right?  She said it looked like a heart with a string on it.  Ah family... so supportive.

Then I got a whole bunch done on the 20th.
As of April 20, 2013, 2254 stitches
 He's headless!  But that's all I have left!
As of April 20, 2013, 2588 stitches
 Here's his head!
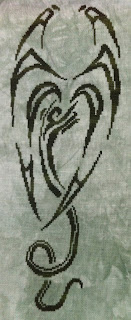
As of April 20, 2013, 2991 stitches - Complete
He's so gorgeous.  I need to get a good picture that really shows the changing thread.

Project Stats:
Pattern: Samurai
Pattern by: Fire Wing Designs
Started Stitching: April 13, 2013
Finished Stitching: April 20, 2013
Fabric: 28ct. Valor Cashel Linen
Floss: Crescent Colors English Ivy 2 over 2
Percentage: 100% complete
Stitches: 2,991 out of 2,991 complete

Oh my gosh!  I hadn't been to the Fire Wing Designs site for a while... and she has three new pieces!  I am lusting after Nocturne!  I must get this piece!!  The blue on blue is just gorgeous!  I think I'll use the same colors as the sample like I did on this piece, but I might add some sparklie to the wings.

Friday, April 12, 2013

No Late Knight Snacking: Fourth Post - Framed

And here's the "companion" piece to Messy... But MINE!, No Late Knight Snacking:


I didn't notice until I took the picture today, but the spacing seems a little off.  I might re-stretch it myself a little bit later.  I think I'm going to put him in my kitchen, right next to my fridge.  That's usually where I stare into at 11 or 12 at night when I think I need a snack.

I'm sorry to say I haven't gotten much of anything else done lately.  Things have been a bit hectic this past week and a half and promise to continue that way through the end of the month.

I need to take pictures of Columbia and Anthera at my parent's place so I can post those.  I'm going there this weekend so I should be posting them soonish.

Messy... but MINE!: Third Post - Framed

This will be the first of two quick little posts.

Messy... but MINE! framed!


My sister came up with pretty much all the framing on this guy and No Late Knight Snacking (which will be posted in a few moments).  Now... where is he going to go on my walls?  That's harder to figure out than how to frame them lately.

Monday, April 8, 2013

A Mother's Pride: Fourth Post - Framed

Just a short post today.  Here's the first project that I got framed recently, A Mother's Pride:


I had mentioned I got three projects framed, but I was mistaken, I had 5 projects framed, and I just took my last four in.

I haven't gotten much done lately due to family issues, so I'll be posting all the pieces I got framed for now.  Hopefully I will have an update on Logan by the end of the week.

Tuesday, April 2, 2013

Beaded Chip 'n Dale: First Post

I've been wanting to work on this one for a while.  I love Disney, really, what's not to love?  A while back I created a bunch of charts with Disney characters, Mickey, Minnie, Donald, Daisy, Goofy, Pluto, Chip 'n Dale & Tinkerbell.  I took some images I found and made them into beading charts.  My two favorites out of them were Pluto and Chip 'n Dale.  To the right is the image I used to make Chip 'n Dale.

All the cartoons I remember had them as the same color so that's how I'm going to make them, plus there aren't a lot of browns in Delicas.  Chip and Dale will be made from shiny beads, while the background will be matte beads.

I decided to start on this when I ran out of one of the bead colors I needed for Logan.  While creating this pattern the upper left corner seemed a little bare so I added an acorn.  You can see a little bit more than half of it in the first progress picture.
As of March 31, 2013, 25 rows.
Now you can see all of the acorn, their eyes, and Dale's red nose has appeared.
As of April 1, 2013, 50 rows.
I didn't get as much done today as I have been getting done, but their heads are now complete.
As of April 2, 2013, 66 rows.
Project Stats:
Pattern: Chip 'n Dale
Original Artist: Disney
Pattern by: Me
Started Beading: March 31, 2013
Beads: 11/0 Miyuki Delicas
Thread: Silamide
Percentage: 45.8% complete
Rows: 66 of 144 complete
Beads: 4356 of 9,504 complete

The beads for Logan have probably arrived, so I'll pick those up when I get back home.  I'll probably go back and forth working on these two for the time being.  And maybe add some french beaded flowers in the mix!